Airshow photography has gotten complicated with all the conflicting advice flying around on forums and YouTube. As someone who has been lugging camera gear to shows for years — destroying my shoulders with heavy telephoto lenses and filling memory cards at an embarrassing rate — I learned everything there is to know about getting great aviation shots. Today, I will share it all with you.
Whether you are shooting with a professional DSLR or a smartphone, understanding the unique challenges of aviation photography will dramatically improve what you bring home. Let me walk you through the equipment, settings, positioning, and techniques that actually work.
Why Airshow Photography Is Its Own Beast
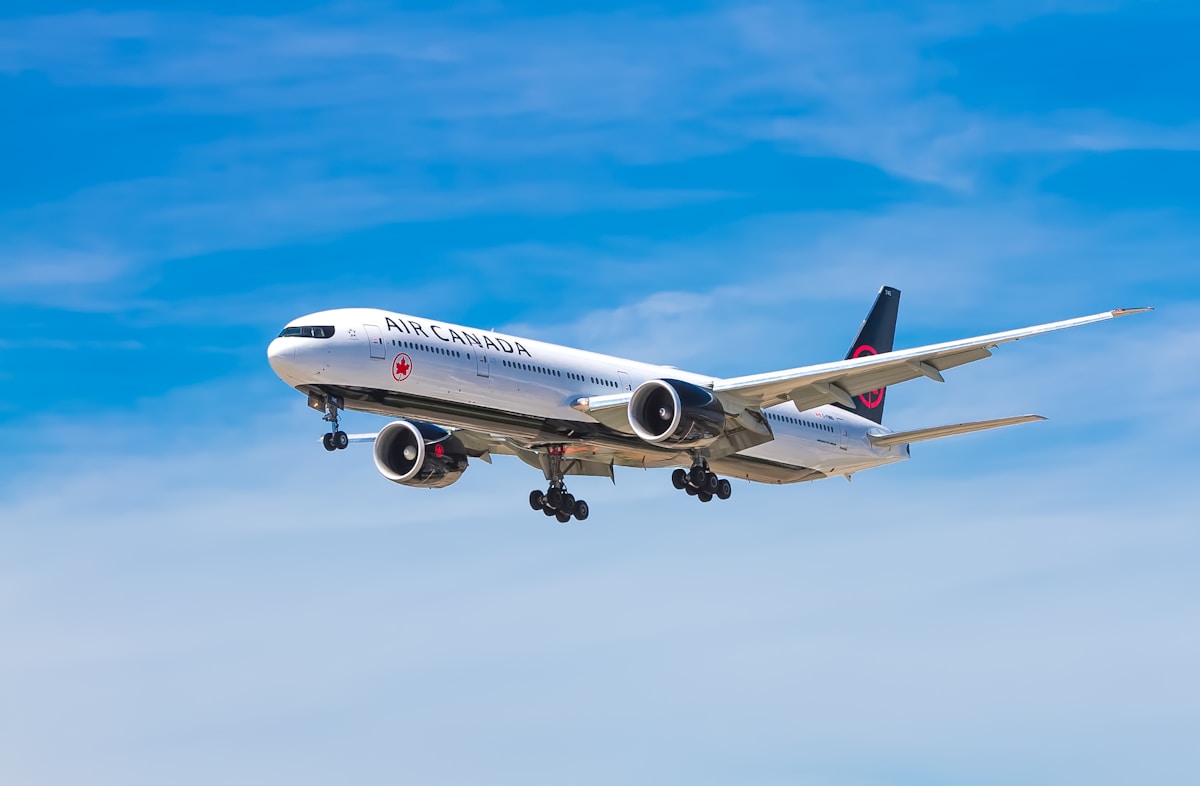
Aviation photography throws several distinct challenges at you simultaneously. Aircraft move at ridiculous speeds — 300-plus mph for jet demonstrations. Lighting changes constantly as planes bank, climb, and dive through different angles relative to the sun. Heat shimmer from runway surfaces blurs distant subjects. Crowds and fencing block ideal positions.
The upside? Airshows also offer incredible opportunities. Demo team routines are predictable once you learn them. The variety of aircraft is huge. And the dramatic maneuvers create photographic moments you simply cannot get anywhere else. It is a target-rich environment if you know what you are doing.
The Gear That Actually Matters
Probably should have led with this section, honestly. Your camera body matters way less than your lens selection. While full-frame sensors offer advantages in low light, excellent results are totally achievable with APS-C and Micro Four Thirds. What truly matters is your autofocus performance and burst shooting capability.
Camera Bodies
Look for fast continuous autofocus, high burst rates — at least 7 frames per second — and reliable subject tracking. Buffer depth matters too. How many images can your camera rattle off before it slows down? During fast action sequences, running out of buffer is painful.
Good entry to mid-range options include the Canon EOS R10, Nikon Z50, and Sony A6400. If you want to step up, the Canon R7, Nikon Z6 III, or Sony A7 IV deliver superior autofocus and build quality. But I have seen people get stunning shots with budget cameras. Do not let gear anxiety stop you from shooting.
Lenses — This Is Where Your Money Goes
Telephoto reach is essential. A 100-400mm zoom gives you excellent versatility — tight shots of aircraft in flight plus wider environmental shots showing the crowd and runway. For dedicated aviation photographers, 150-600mm supertelephoto zooms provide the reach for distant passes without being totally unmanageable.
Prime lenses like a 400mm f/5.6 or 500mm f/4 deliver sharper images but lock you into one focal length. Most airshow photographers find high-quality zooms offer the best balance. Flexibility beats absolute sharpness when aircraft are unpredictable.
The Accessories That Save You
A monopod provides stability without tripod bulk and lets you reposition quickly as aircraft move. Bring multiple memory cards because you will easily blast through thousands of images during a busy day. I speak from experience. Spare batteries are non-negotiable since continuous autofocus and rapid-fire shooting drain power fast.
A lens hood cuts flare when shooting toward the sun. A polarizing filter enhances blue skies and reduces haze, though it costs you 1-2 stops of light. A clear UV filter protects your front element from the dust and grit that airshows generate in abundance.
Camera Settings That Actually Work
Right settings depend on what you want to achieve. Two main approaches dominate: freezing motion for tack-sharp images, or panning to create blur that conveys speed and energy. Both have their place.
Freezing Motion
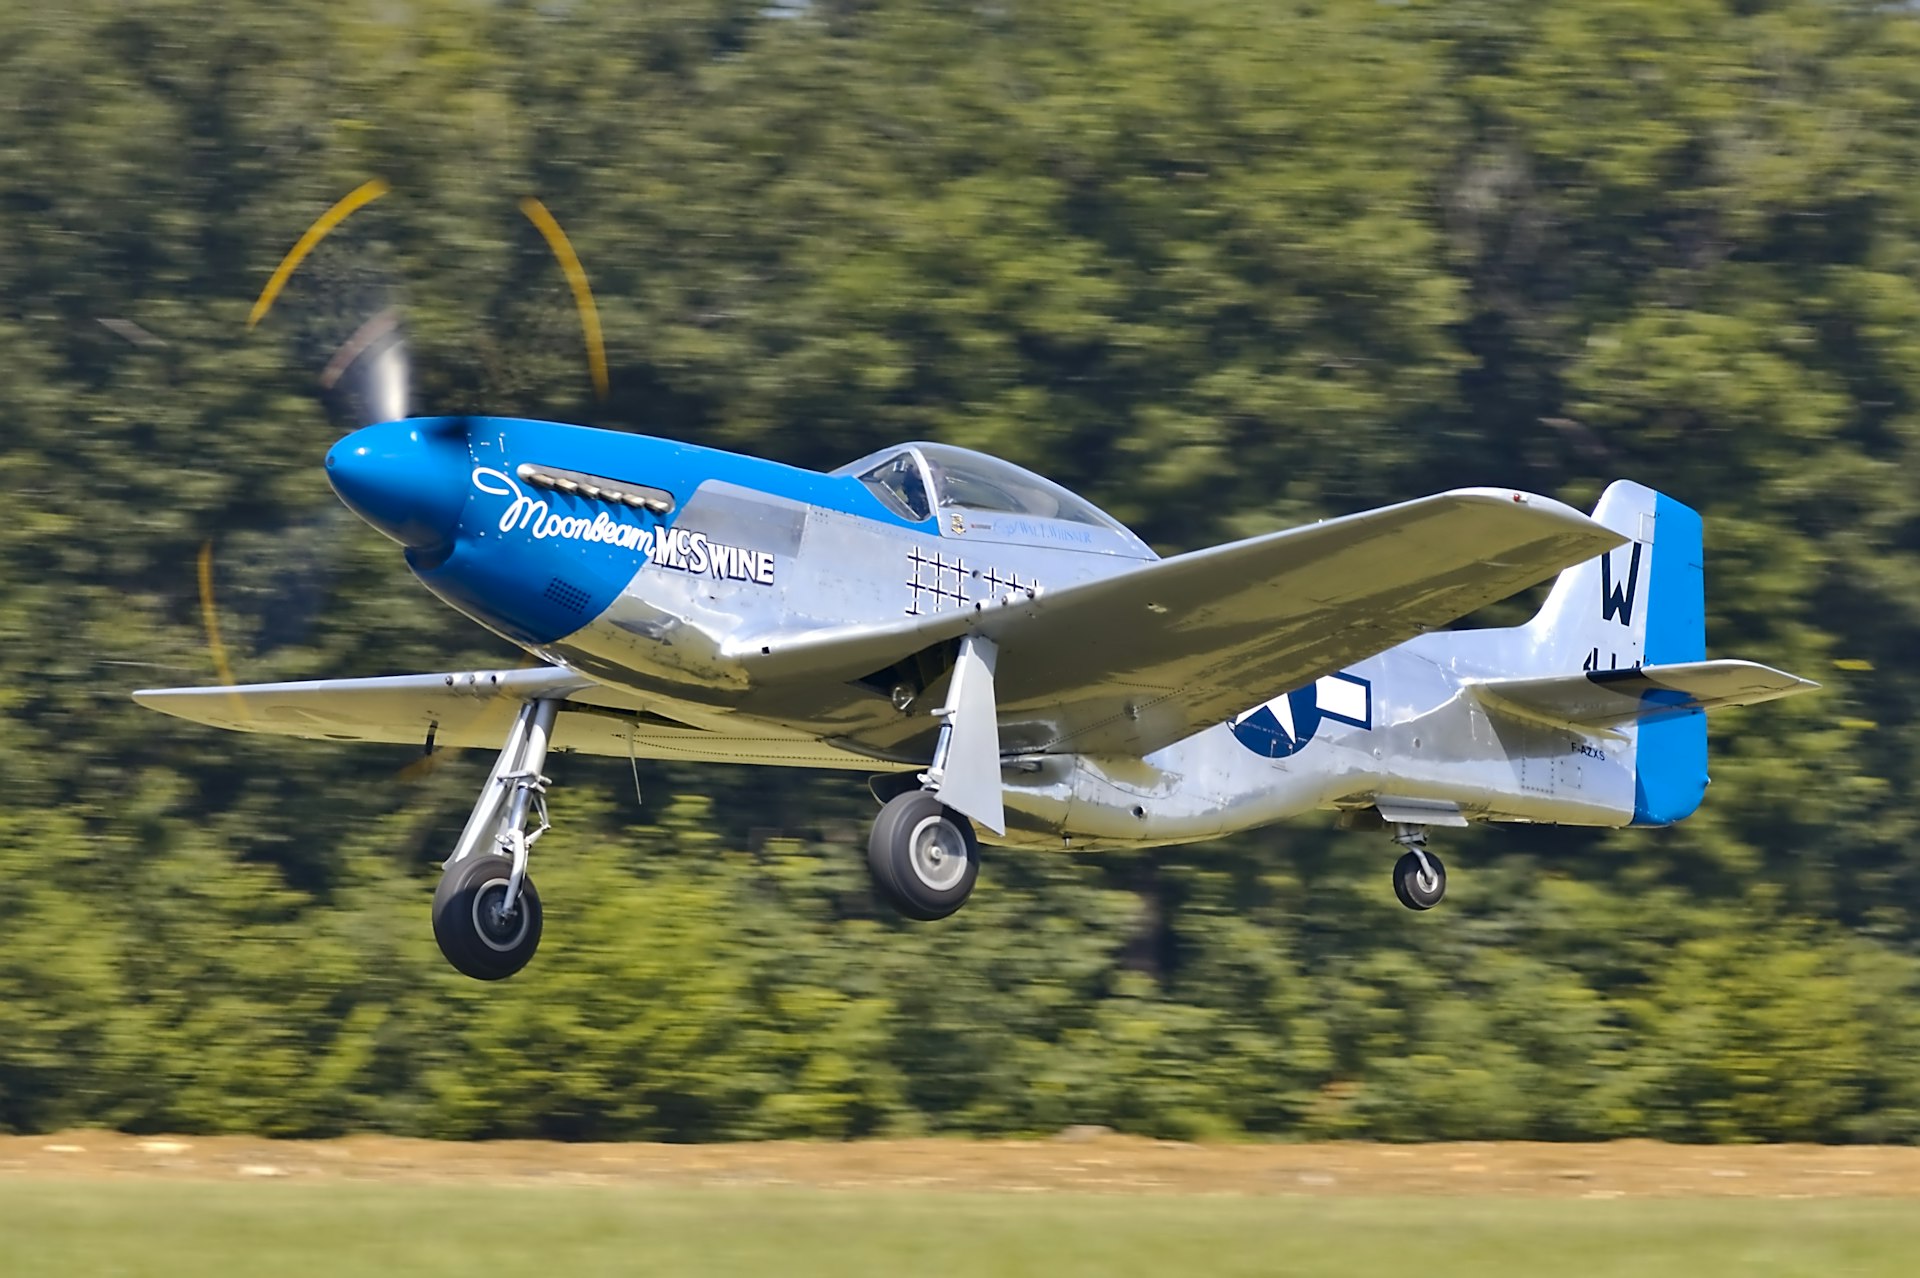
For jets, you need shutter speeds of at least 1/1000 second. I usually start at 1/2000 and adjust from there. Fair warning though: using fast shutter speeds on propeller aircraft creates an unnatural frozen-prop effect that looks weird. The propeller disc should be blurred for a natural look.
Set your camera to aperture priority with auto ISO. Choose f/8 for optimal lens sharpness and let the camera pick the ISO needed to hit your minimum shutter speed. Modern cameras produce clean images at ISO 3200 and beyond.
Panning — The Advanced Move
Panning means tracking the aircraft while using slower shutter speeds to blur the background while keeping the subject relatively sharp. This creates those dynamic images that scream speed and motion.
Start at 1/250 for jets and 1/60 to 1/125 for prop aircraft. The slower speed lets propellers blur naturally, which looks way more realistic. Fair warning: successful panning takes practice. Expect a lot of failures before you get consistent results. That is completely normal.
Autofocus Setup
Set continuous autofocus — AI Servo for Canon, AF-C for Nikon and Sony — with a wide tracking area. Modern cameras with aircraft subject detection are genuinely impressive at grabbing and holding focus on planes across the frame.
If your camera lacks aircraft detection, use a zone or group focus area centered in the frame. Avoid single-point autofocus. The narrow focus area makes it brutally hard to keep a fast-moving aircraft centered.
Where You Stand Changes Everything
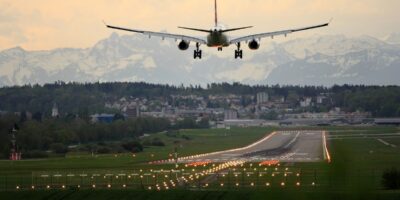
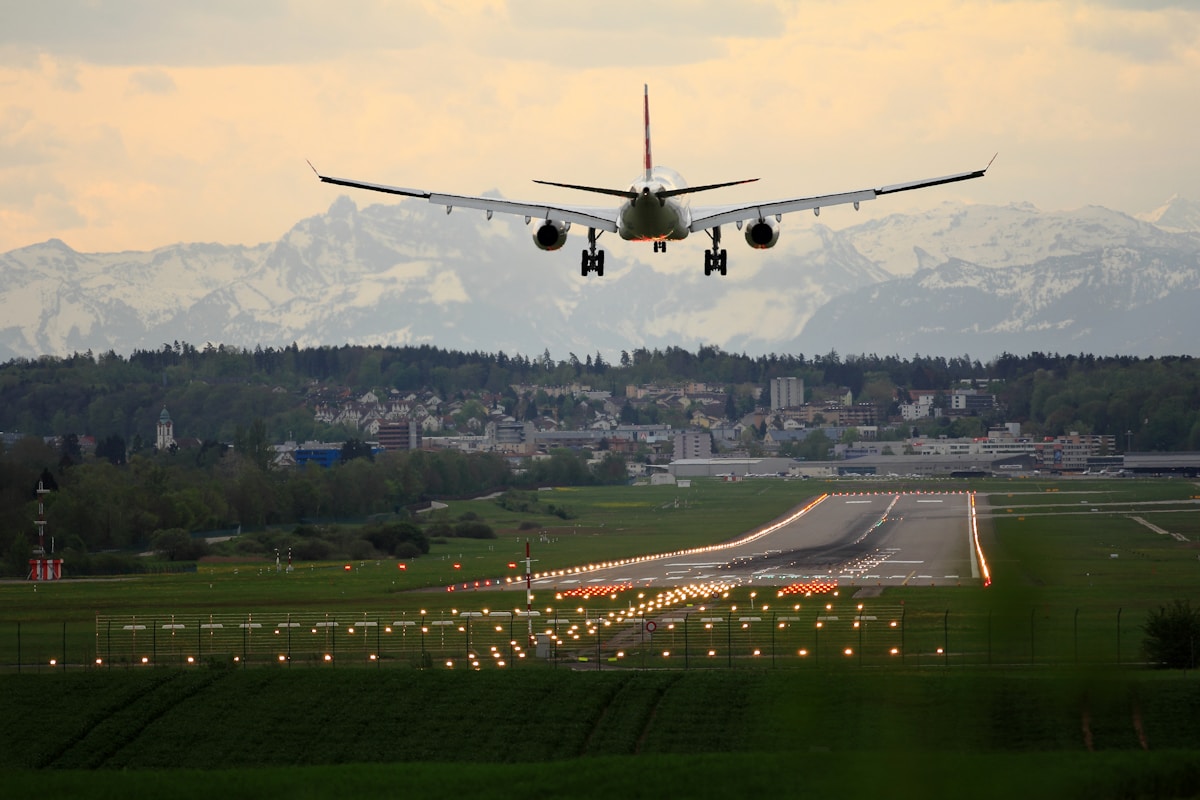
Positioning is everything. Get there early and scout the show line. Figure out where the sun will be throughout the day and where the flight paths run.
Light Direction
Morning sun comes from the east, so eastern positions give you front-lit shots early. Midday sun goes overhead and creates harsh shadows. Late afternoon brings warm western light. The classic advice is to keep the sun behind you. But backlit shots with sun behind the aircraft create dramatic silhouettes and rim lighting too. Try both.
Show Center Versus the Edges
Most photographers crowd show center where the most dramatic maneuvers happen. Close passes are exciting, but the competition for space is intense and everyone’s shots look the same.
The edges of the crowd line often give you unique angles on approaches and departures. Cleaner backgrounds. More working space. Fewer elbows in your ribs. Some of my best images have come from spots most photographers ignore.
Different Aircraft Need Different Approaches
Demo Teams
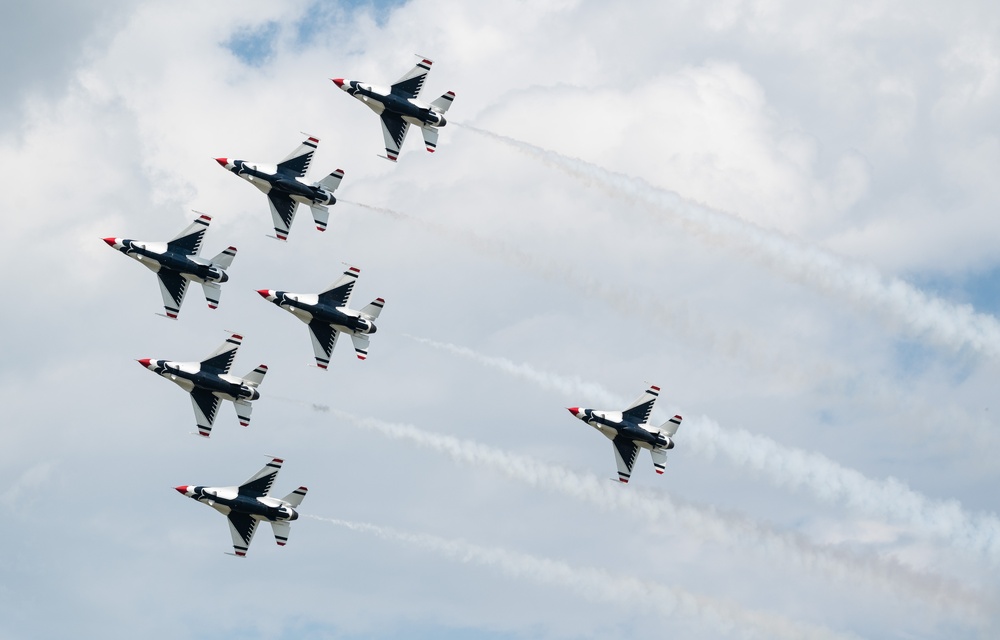
The Blue Angels and Thunderbirds fly choreographed routines that repeat at every show. Watch their performances on YouTube beforehand so you can anticipate signature maneuvers like the Delta Breakout or Bomb Burst. Knowing what comes next gives you a massive advantage.
Tight formations challenge autofocus systems. Pre-focus on the patch of sky where you expect the formation, then let tracking take over as they enter your frame.
Warbirds
WWII fighters and bombers fly slower than jets, which makes them easier to track but demands slower shutter speeds for proper propeller blur. The sound of a Merlin or radial engine combined with graceful flight paths makes warbirds incredibly photogenic. Multi-ship warbird formations are gold for compelling historical compositions.
Aerobatic Performers
Solo aerobatic acts throw unpredictable maneuvers at you that test your tracking skills hard. Smoke trails create dramatic compositional elements — include them in the frame. Watch for knife-edge passes, inverted flight, and tumbling maneuvers that produce the most striking single images.
Post-Processing Your Shots
Even well-captured images benefit from thoughtful editing. Lightroom and Capture One are the go-to tools for aviation photographers.
The Basics
Start with exposure and white balance correction. Airshow images usually benefit from bumping contrast and clarity slightly to make aircraft pop against the sky. Recover detail in dark undersides and bright clouds using shadow and highlight sliders.
Cropping
Careful cropping improves composition and removes distractions. Straighten horizons and runway lines. Panoramic crops work well for formation shots while tighter square crops emphasize single aircraft. Do not be afraid to crop aggressively if the composition demands it.
Noise
High ISO images from fast action often need noise reduction. Apply luminance noise reduction carefully to preserve detail. AI-based tools like DxO Pure Raw or Topaz DeNoise AI produce excellent results without killing sharpness.
Getting Better Over Time
That’s what makes airshow photography endearing to us who are hooked on it — there is always room to improve. Attend multiple shows per season to build experience with different lighting, aircraft types, and venues.
Review your images honestly after each event. Did autofocus drop out during certain maneuvers? Were shutter speeds too slow? Use that analysis to adjust next time. Connect with other aviation photographers through online communities and local camera clubs. Sharing work and getting feedback accelerates learning enormously.
And most importantly? Put the camera down occasionally and just watch the show. The best aviation photographers balance capturing images with actually appreciating the incredible skill and heritage on display. Your eyes will see things your camera cannot.